

The a5100 is a camera recommended a lot (by me) for video. You’ve bought it and started recording, and well your footage doesn’t look like other people’s footage with the same camera.
In this post, we’ll go through setup tips and tricks and what you can buy to make your Sony a5100 video look a lot better without costing a fortune.
Don’t worry the Sony a5100 is a great camera for YouTube videos, I’m using it to record all of my videos. But there are some things you can do to improve the look of your videos cheaply or even for free.
In-camera Settings
First, make sure you’re using the camera’s best video format settings for recording video, there are a couple of settings you change to get the best quality video from the a5100. First is the file format, make sure this is set to XAVCS. This can be found on the menus under –
Camera Settings > Tab 2 > File Format
This will make your file larger than AVCHD or MP4 but the quality will be noticeably better. For a full explanation of file formats, you can check out this video here where I go into detail about the differences.
You can also choose the frame rate of your video recording on the same menu page by changing Record-Setting, 60p meaning 60flps and 30p 30 fps (in Europe these options are 50p/25p.
Next, we’ll look at some cheap or even free things you can do to improve your videos. The most important of these is lighting, cameras need light, and if they don’t have much then automatically they will add artificial light called ISO to brighten up your shots, however, this always adds grain which reduces the quality. SO how can you improve your lighting?
Lighting
The cheapest option is to use natural light, either outside or by a window however natural light is inconsistent. The sun can go in and suddenly the whole room will be a lot darker and change your shot. Always bright light directly on your face isn’t going to look good, especially if it doesn’t cover your face evenly.
But lighting is something you can improve fairly cheaply. First of all, I wouldn’t recommend using your room’s lights unless they’re very soft and neutral in colour. If I use mine they’re very yellow-looking and not quite what I’m looking for. SO I use two low-budget lights in addition to natural light when I record. One softbox light and one small LED panel light. The softbox light I use is the Raleno 800w and costs around $40, and is often on sale for cheaper. It comes with a diffuser so the light isn’t too harsh on your eyes and is nice and bright. It also comes with a tripod to mount the light at any height. I’ve used this light for a year now and works well to boost your video’s light. I find the best way to use it is paired with natural light where light is coming in from a window.
The other small light I use is this Samtain LED panel, is not strong enough on its own to light your whole shot, but is useful to add a little extra light if part of your shot is a bit too dark, I use this a lot on overcast days and natural light isn’t very bright. This again costs around $40 on amazon.
There are of course other options, a popular one with Youtubers is ring lights that are cheap and do a great job of lighting your face, I don’t personally use one as they’re not great for glasses wearers as you’ll get reflections of the ring light in your glasses.
There are also much smaller softbox lights out there if you don’t have the space for the larger one I’m using.
Audio
Another important thing you can improve which is often overlooked is the audio. Poor audio is more likely to lead to viewers turning off than bad visuals. The a5100 has built-in stereo mics which can perform well on their own, but they will pick up room ambiance and other background noises, which could overpower your voice and sound echoey.
Unfortunately, the a5100 has no audio jack for plugging in a mic so if you want to record better audio you’ll need a separate audio recording device. The main options are a dedicated audio device such as the Sony ICD PX 470, which you can use to record your audio separately from your video then sync up in editing. This option gives you a small device that is easy to carry and can use the built-in mics or attach a mic, such as a lapel mic for a discreet option. You can pick one of these up for around $50.

The other main option is a studio mic, which are larger and more expensive. If you’re only recording in one place these may be preferable as the audio quality will be better. There are 2 types of mic you can go for condenser or dynamic. The main thing to think about here is condensers will pick up more of the room’s ambiance but can be placed further away ideal if you don’t want a mic in shot. They provide a very full well-rounded sound. A dynamic mic is more directional and will need to be placed much closer to the sound source for a clear recording. This may even mean having the mic in shot. Both are viable options depending on your situation. A good condenser mic is the Blue Yeti $130 or dynamic I use the Shure sm58 which costs around $100 but will need an audio interface, USB options are available though. If you’re in an echoey room also consider using soft furnishing to dampen the sound, this can be as simple as bringing in a duvet or blankets while you’re recording, you don’t need to shell out on pro acoustic panels, though of course, they are a good option.
Lenses
If you’re using the Sony a5100 straight out of the box to make videos then you’re likely using the 16-50mm kit lens. And I’m happy to say this is a pretty good lens, it’s wide enough for indoor use, with a decent zoom range if you want to get in a bit closer.
However it does have some drawbacks, its low light performance isn’t the greatest, with a maximum aperture of f3.5, it means filming in darker rooms or outside at night will require the ISO to be bumped up, which will lighten your shots but will add more grain. Also the more you zoom in with the kit lens the narrower the aperture gets making your shots even darker. But in a well lit consistent environment, you can still get decent results from the kit lens. If you’re on a tight budget stick with the kit lens and use it until you can afford an upgrade.
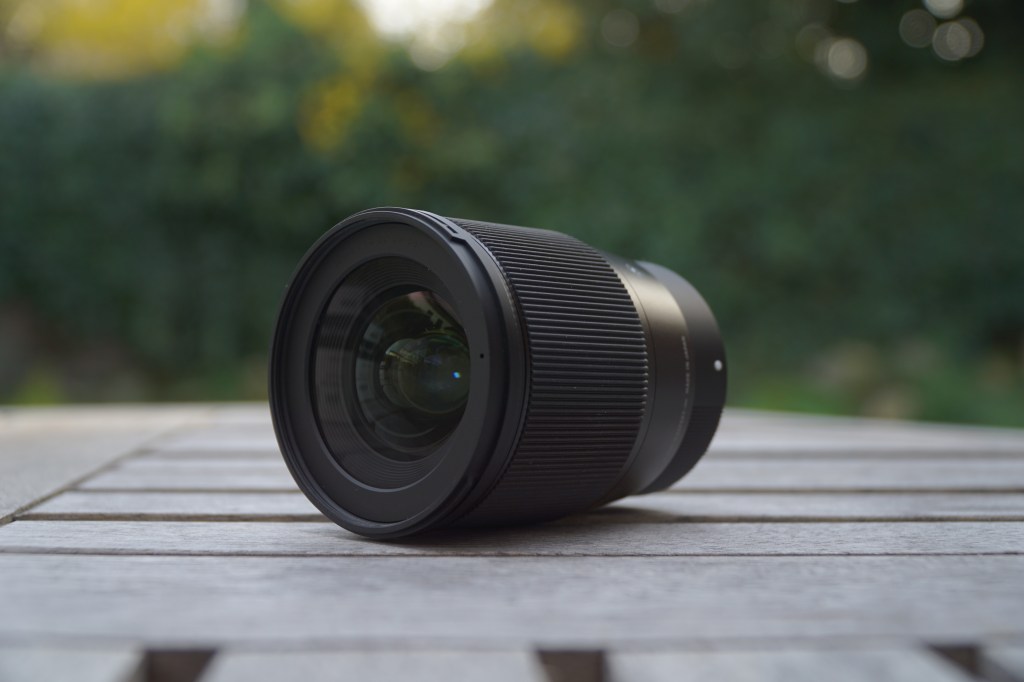
And upgrading to a prime wide aperture lens will improve your video’s look. I use the Sigma 16mm f1.4 which is a great lens for this range of shooting. Its wide aperture lets in lots of light and is capable of shallow depth of field for those smooth out of focus backgrounds The wide maximum aperture means the camera will capture more light from the same situation as the kit lens, without needing to bump up the iso. It’s a great video lens for static shots mounted on a tripod, but unfortunately, it is expensive coming in at around $380 so a big decision. For a full review of this lens, I’ve made a video about it here. – https://youtu.be/nEtutnxYsZ8
This type of upgrade does make a difference, but you’ll probably see more instant results from the lights over the lens.
Other Tips
Other quick tips are, your filming environment might sound obvious but keep your location clean and free of distractions will always look more professional, some well-placed background lights can look nice. Also, use a tripod to keep your camera steady and level, you can pick up 6 ft tripods really cheap around $30 which will be more than good enough for indoor recording (though probably a bit weak for outdoors)
And if you use all these tips in combination, you’ll see and hear a massive improvement to your video quality.
DISCLAIMER: This post contains affiliate links, which means that if you click on one of the product links, I’ll receive a small commission. There is no additional cost to you.
